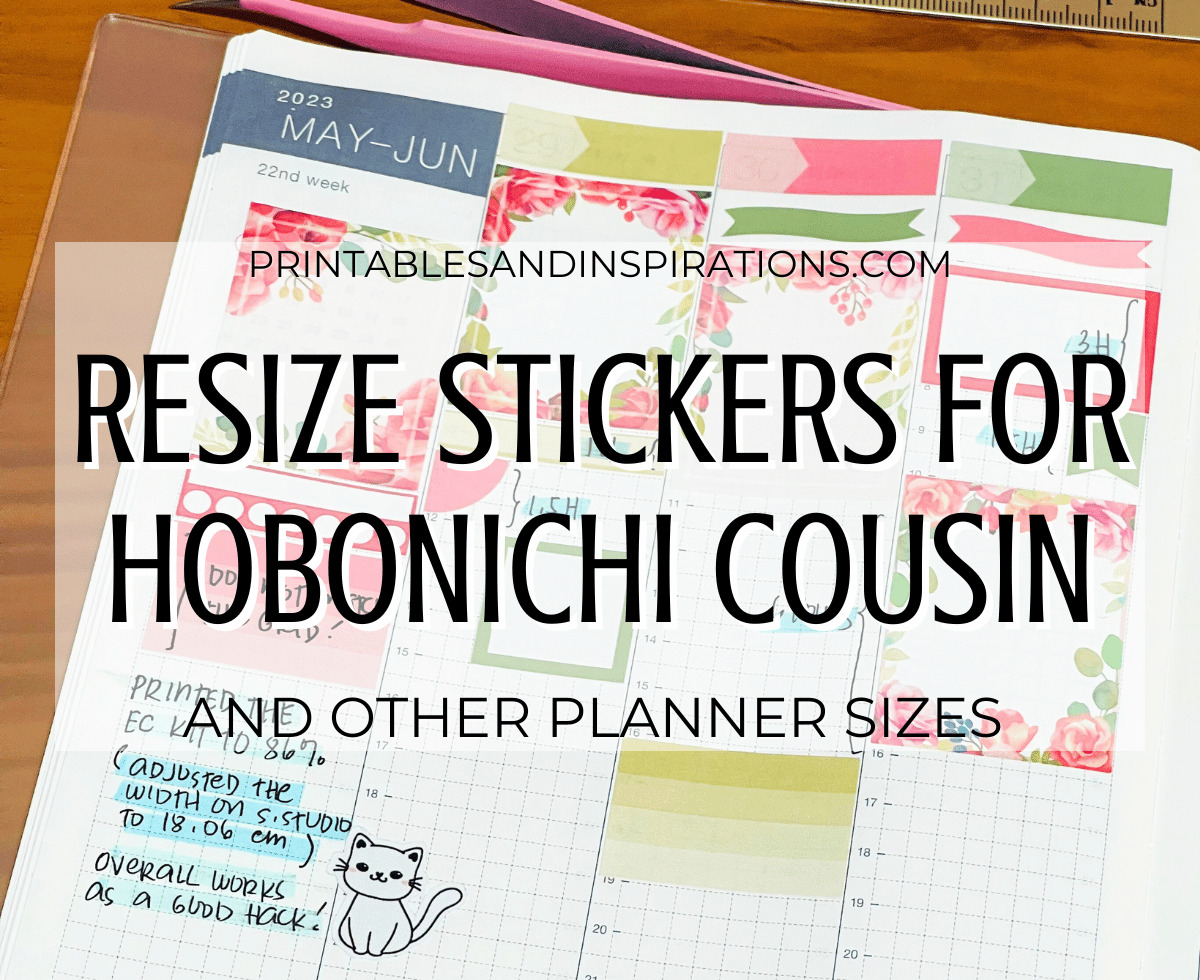
Hi loves and fellow sticker addicts ! Here are the steps how to resize weekly stickers for the Hobonichi cousin. I am referring to the Erin Condren or Happy planner stickers that you want to use with your Hobonichi planner. These steps make your stickers smaller so they fit inside Hobonichi Cousin weekly columns or boxes.

Looking for more stickers? You may download our free sticker sheets and resize them accordingly. This is also perfect if you previously purchased printable weekly stickers from Etsy.
CLICK HERE TO SEE OUR FREE WEEKLY STICKERS
Don’t have a Hobonichi Cousin planner? You may try out these stickers on our free printable weekly spreads. Each weekly spread has 8 columns ( 7 days + notes).
Check out the free dated weekly spreads here or the blank weekly spread here.
DOWNLOAD OUR FREE WEEKLY PLANNERS
How to resize weekly stickers for the Hobonichi Cousin planner
Resizing stickers and cutting with scissors
Here are the steps to make your printable Erin Condren or Happy planner stickers smaller before printing them. You will need the sticker PDF file.
- Download the sticker kit PDF file.
- Open the PDF file using Adobe Acrobat.
- Change the page size to 86% .
- Print on sticker paper and cut using scissors or paper cutters.
Here’s a quick look at the printer settings before printing.

Resizing stickers for your sticker cutting machine
You will need the sticker PNG file, Silhouette Studio and cutting machine. I personally use the Silhouette Portrait 3 which is light and takes up only a small space. (Affiliate link here.)
If you have a different cutting machine, you may adapt these steps. Just be sure to resize the PNG image to 86% before cutting the stickers.
Resizing stickers using Silhouette Studio
- Download the sticker kit PNG file.
- Make a new Silhouette studio file and merge the PNG file (A4 size).
- Click on the image and change the width to 18.06 cm. Make sure that the aspect ratio is locked. (The width of A4 paper is 21 cm and 86% of that is 18.06 cm.)

4. Create cut lines using the TRACE PANEL.

5. Proceed to print your stickers and cut with a Silhouette machine.
Why 86% or how to resize for other planners
I calculated this ‘magic number’ using ratio and proportion. EC and Happy planner boxes are 1.5 inches wide while Hobonichi Cousin boxes are 1.3 inches wide, approximately. We find the percent using the formula and the answer is 86.67. I decided to use 86% for simplicity and to make sure the stickers are smaller than the boxes.
( 1.3 / 1.5 ) x 100% ~ 86.67 %
You can get 86 percent of any number by multiplying it by 0.86 and in the case of A4 size sticker paper,
21 cm x 0.86 = 18.06 cm
You can use this formula with any planner but make sure that you are making the stickers smaller, not bigger. Making the stickers bigger may result in pixelated images. On the other hand, making the stickers too small may give you less definition so you really need to do some trial prints.
I hope you are able to use these steps to resize your printable weekly planner stickers for your Hobonichi Cousin or other planners. Enjoy your stickers and happy planning!
Love,
Mae

